Showing posts with label Ribbon. Show all posts

Wednesday, 3 January 2018

Sale-A-Brate good times

Good morning it's January 3rd and FINALLY I can share the new Spring/Summer catalogue with you.

Click here to take a look

The new catalogue is jam packed full of new stamps, kits, dies, embellishments and of course, new DSP.  Over the coming weeks, I will be sharing pictures of the products and samples of what can be made with them.

Now if that isn't enough to tempt you to take a look Sale-A-Bration 2018 starts today as well.


For every £45 that you spend you will be able to chose a level 1 free gift and if you are spending £90 or more (This could be an order from you AND your friends that you organise) you will be able to chose a level 2 free gift believe me, they are worth having.  

Click here to see the level 1 gifts and here to see the level 2 gifts.

Check out this video to see just some of the new items.  At the end of the video I show you both of the level 2 gifts.


I'm so excited to share all of this with you. 

If you haven't already, please follow my blog to stay up to date on all of the news as it comes in.  If you are a new customer to Stampin' up, please chose me as your demo.  You can find out how here.

I have a number of tutorials planned for this year and new challenges.  This year is already off to a flying start and I can't wait to show you what I have been making.

Enough from me.  Enjoy the new catalogue 😁

Ny x


Friday, 6 October 2017

Dear Christmas...

Hi  Crafty Stashers.

I have never been one for traditional Christmas cards.  It's not that I can't make them.  I can, but my brain just doesn't really go there. 

For this card I decided on a pink and blue colour scheme.


This is quite a simple card.    I started by cutting a piece to measure 5.25" by 5.25" from a sheet of designer paper from the Bundle of love 12"x 12" pack.  I selected a die that was big enough to frame the embellishment that I wanted to use and created an aperture in the pink patterned paper using the bigshot.

Next I cut a piece of Soft Sky card stock to measure 5.5" by 5.5"

Using the same size nesting die that I used to cut my aperture and the next size up, I created a frame using more of the Soft Sky card stock. 


Now it was time for assembly.  I threaded some Whisper white 1/8" sheer ribbon through my embellishment, making sure that it was long enough to go from just above the aperture to where I wanted it to sit.  I also added a double layer of foam adhesive strip to the back of the embellishment to make sure that it would sit exactly where I wanted it to.

I used tape to secure the ribbon to the back of my pink piece.  Next I glued the frame on the front of the card making sure that it lined up properly with the aperture I had created.  I then matted the front of the card onto the Soft Sky card that I had cut to size earlier.

I took a sheet of Whisper White A4 cardstock. I cut it to measure 5.75" wide and then scored down the middle to create my card base.  All that was left to do was to attach the card front to the card base and add a sentiment.

Still working with the original sheet of Soft Sky cardstock, I stamped "Merry & Bright" from the Hearts come home stamp set.  I then punched my greeting out using the Every day label punch.


I trimmed down both of the longer sides so that I have what you see above.  I added my greeting to my card using more foam adhesive strip and added a couple of tiny gems.

Shopping list
Bundle of love  144143
Soft Sky card stock 131292
Whisper white 1/8" sheer ribbon 144172
Foam adhesive strip 141825
Whisper White A4 cardstock 106549
Hearts come home stamp set 145416
Every day label punch 144668

Thanks for stopping by.
Happy crafting.

Ny x

Tuesday, 3 October 2017

Hearts come home

Hi Crafty Stashers.

Last week I told you about my favourite bundle from the Autumn?Winter Catalogue.

Hearts Come Home Clear-Mount Bundle146068
Hearts Come Home Wood-Mount Bundle146065

There is so much to play with in this bundle that I haven't explored it all yet, but here are the first few cards that I have made featuring some of the thinlits in this bundle.

I have shown this first one to you in an earlier post.   I will be creating a tutorial soon on how to make this card.  It is so easy to make and all you need is two sheets of cardstock.  I used Dapper Denim 141414 and Whisper White 106549

This is a new home card that I created using the same thinlet dies, but you could just as easily do this using the stamps in the bundle.  I just wanted to show that, even if you only buy the thinlet dies, they can still be used for a variety of themes.  For this card I used Whisper White 106549, Soft Sky 131292 and Old Olive - 106576 cardstock.  I also used Whisper White 1/8" Sheer Ribbon - 144172

This is my wedding card using the same thinlit set.  I haven't added a sentiment yet as I want to order Floral Phrases - 141767.  

For this card I used Soft Sky 131292 and Blushing Bride - 131287  cardstock, Whisper White 1/8" Sheer Ribbon - 144172, Bundle of love speciality designer paper - 144143 and Gold foil sheets 132622.

Thanks for stopping by.

Ny x


Tuesday, 26 September 2017

But I want it all...

When I first got my hands on the annual catalogue I started putting post it notes on all of the pages that had items on that I wanted.  It got to a point where I couldn't get back to pages that I wanted to look at because of the forest of tabs sticking out from the top and side of the catalogue.  I now have a spreadsheet with it all on lol

So how do you go about deciding what to order first?  Because most of us live on a budget and spending a months income on crafty stash, just isn't going to happen in one go lol

This is my advice.

Very Vanilla Solid Baker's Twine - 144224

This is very versatile as it can be dyed using ink refills to match your current project.

Whisper White 3/8" Classic Weave Ribbon - 144159

Again, this can be dyed to match your creation

Pick a product suite and work on collecting all of the pieces that you like.  This way you are guaranteed that every thing you have will coordinate.  Click here to take a look at the videos that I created talking about the Color Theory suite.  I am currently collecting the Eastern Palace suite.  I will get a video up for that soon.

The hardest thing for me was buying cardstock.  I wanted ALL the colours NOW.  What I have been doing instead of buying the individual colours of cardstock is to buy the cardstock packs that go with each of the product suites.

Eastern Palace A4 Cardstock Pack - 144149

This pack contains 24 sheets of A4 card stock.  You get three different colours in the pack and there are eight sheets each colour.  This allows me to build up my colours whilst working out which  I will use the most and will need to get a  pack of 24 sheets of.

Another way forward with the cardstock is to buy the assortment packs for each collection.  You will receive two sheets of each colour in that collection. 

Bundles are great.  They typically consist of a set of stamps and either thinlit dies or apunch.  This is one that I have.
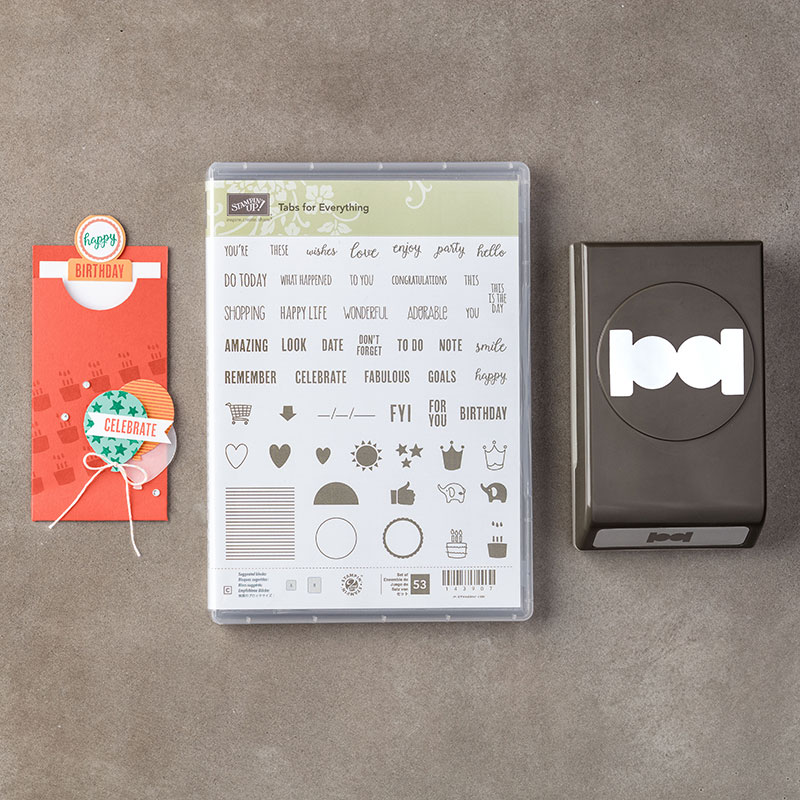
Tabs For Everything Photopolymer Bundle - 145364

Pick a bundle that can be used for a variety of different occasions and projects.  I picked this set because I can use it in a planner that I am working on, cards for all ages and also mini albums.  Also buying bundles is cheaper than buying the items individually.

So this is my advice on getting started on your Stampin' Up WANT list.

I haven't talked ink on this post as there is a fair bit in my head that I want to say and I think it will need a WHOLE other post lol